Thursday, December 29, 2011

Year in Review Blog Hop


My friend and fellow former Amber Ink torchbearer, Karin, is hosting A Year in Review Blog Hop. It's fun to see synopses of other peoples' favourite creations; I decided to participate because two of my 2011 favourites haven't even been blogged yet! (Did December suddenly get really busy for anyone else, by any chance? :P There were cards and tags I photographed but never blogged, and at the end made but never even photographed!) 
Here are some of my 2011 favourites:


Original post here.
Love the Echo Park patterned paper!


Original post here.
Shakespeare, lots of fun little details, not-bad colouring. Happy sigh.


Original post here.
Someday, this will be my feeling exactly. In the meantime, a fun 60th birthday card for someone else


Original post here.
A little out of my box, in a good way. 


Original post here.
I just like this.


Original post here.
A more subtle age-related birthday card. 


Original post here.
These two snowmen, and the happy colours, make me smile. 


The only cat Christmas card I made this year! Magenta stamp, Cuttlebug faux letterpress background, Glossy Accents on the ornaments, Stickles, computer-printed sentiment on vellum. 


I love the expression on the face of this Ippity penguin. I also love how perfectly the polka-dot paper works for a snowy background! 
To join in this fun year-end review, head over to Karin's blog and link up a post of some of your favourites, too! (Oh, if you need more incentive... there are prizes!) And Happy New Year!  Pin It Now!

Sunday, December 25, 2011

Pin It Now!

Wednesday, December 21, 2011

Crafty Creations Challenges: Blog Hop!

Welcome to the Crafty Creations Blog Hop and Two-Week Challenge! You should be arriving here from Jaime's blog. If this is your first stop you can always start by going to Claire's blog.
The two week challenge is: A Card or Gift of Gratitude or Thanks. I decided to make one of each: a tag for a hostess gift as well as a card. First, the tag:


This was partly inspired by a bottle of wine friends brought to our house the other evening. It had a promotional tag on it, and I noticed the paper loop hanger at the top. I usually make a tag that ties on with ribbon, but thought it would be fun to try this style. Is this sentiment not perfect for the gift of a festive libation?
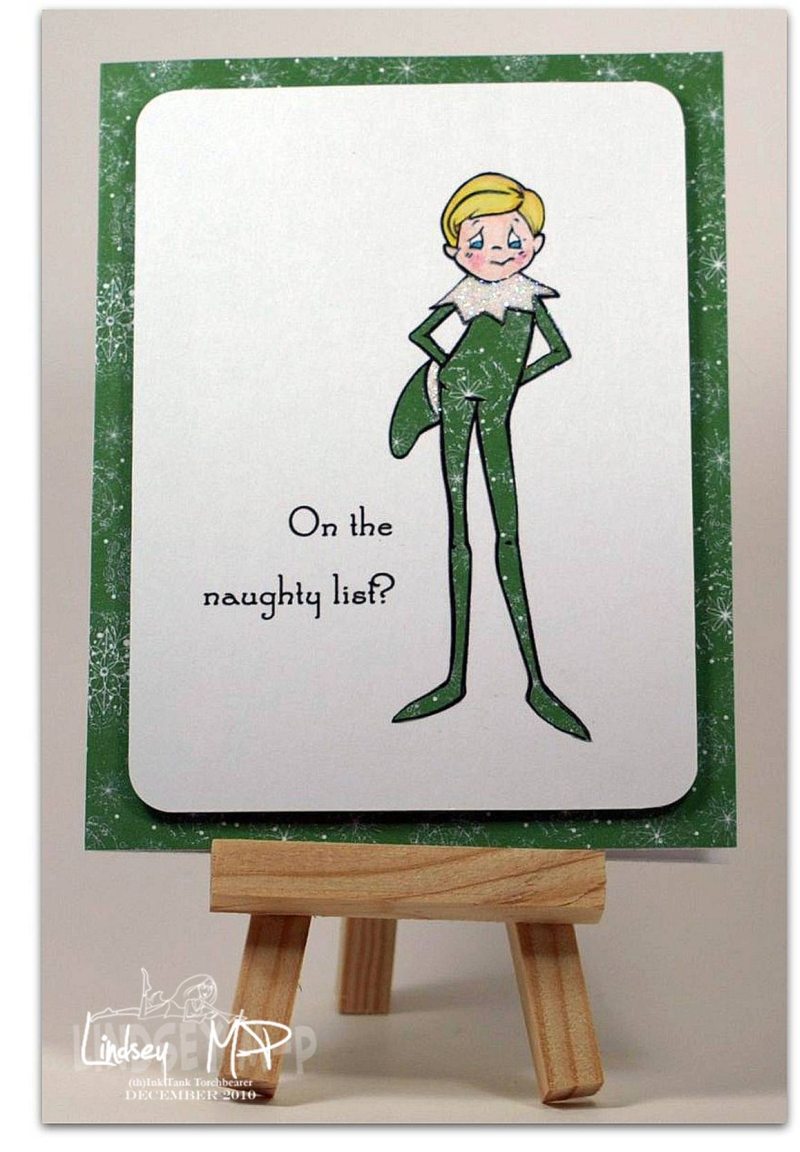
And my card:


Green glitter embossing tinsel is hard to beat for Christmas, and I thought it was perfect for this stylized tree. (As always, the shine shows up much better in real life, as does the lettering in the sentiment. Photography's funny that way, sometimes. )
Thanks for stopping by! Remember to enter Crafty Creations two-week challenge for your chance to win one of the many sponsored prizes! Your next stop on the hop is Donelda's blog. If you happen to get lost along the way, come on back here or head over to Crafty Creations for the complete order list.  
1. Claire
2. Deena 
3. Bernie 
4. Dawn 
6. Kaos 
7. Rudlis 
8. Jenni 
9. Donna 
10. Peggy 
11. Jaime 
12. Lindsey 
13. Donelda 
14. Kathleen
15.Crafty
Creations


Supplies: (tag) manila file folder, white & Stampin' Up real red & old olive cardstock, Amuse Studio wreath stamp, Unity/Jillibean Soup Christmas Eve Chowder stamps, Hero Arts Get Merry! stamp, Brilliance coffee bean ink, Stampin' Up old olive & real red inks, clear & clear glitter embossing powders, Spellbinders nestabilities circle dies, Sizzix holly embossing folder, icicle Stickles, red Liquid Pearls, Fiskars glue dots, pop-dot tape; (card) Stampin' Up very vanilla cardstock, Unity November Kit of the Month (All Seasons) stamps, Versamark ink, Ranger green embossing tinsel, Marvy corner-rounding punch, pop-dot tape
Pin It Now!

Friday, December 9, 2011

Blog Candy Winner!

The winner of my birthday blog candy from this post is ...
Jen W.! Congratulations, Jen! Please send me an email with your snail mail address so I can get the Inkadinkado stamp set off to you soon!  Pin It Now!

Paper Crafts Magazine: Donelda's Turn

Here's my card based on Donelda's pick from the November/December 2010 issue of Paper Crafts magazine, Beth Opel's Rejoice card on p. 48:


Donelda told me she picked it both because it would be a bit of a creative stretch for both of us (um, yes) and because of the ribbon treatment on it. So I definitely wanted to try a similar ribbon style. I did delete a couple of the layers of the original card, because, well, I rarely do a lot of layers. I also don't do a lot of browns, so like yesterday, I went for red. I also used the same sentiment stamp as yesterday, but masked out the little poinsettia in the middle so I could use a circle of the patterned paper, instead. 
Can't wait to see what Donelda's come up with today, especially after her beautiful CASE (Copy and Share Everything) of my inspiration pick yesterday. You might also want to stop back here later today to discover the winner of my one-year-of-blogging blog candy winner! 


Supplies: Stampin' Up real red & very vanilla cardstock, (?) patterned paper, Hero Arts Joy stamp, Colorbox cranberry ink, clear embossing powder, Fiskar's threading water border punch, recycled ribbon, pop-dot tape Pin It Now!

Thursday, December 8, 2011

We're Back!

Donelda and I had such fun a few weeks ago picking Paper Crafts magazine cards that we would each CASE, we decided to do it again! I convinced Donelda to dig out last year's November/December issue -- I'd bought it last year, but in the holiday rush, I only had time to make a few tags inspired by all the projects in it! One of the reasons I picked up the magazine was the feature on music, so I decided to pick Kelley Eubanks' Musical Joy card on p. 67. Here's what I came up with:


I used the same layout as Kelley, but switched to a red card base instead of black. I used a strip of music paper from the Stampin' Up newsprint collection, and backed it with a strip of black. This plaid ribbon is one of my favourites to use at Christmas, and I'm going to be so sad when I get to the end of the roll! I coloured the rhinestone with a Sharpie to match the card base. I'm entering this card into the inspiration challenge at Ribbon Carousel (RCC32).


Don't forget to head over to Donelda's blog to see what she came up with! Tomorrow we'll be revealing her pick from this issue.


Supplies: black & Stampin' Up real red cardstock, Stampin' Up newsprint patterned paper, Hero Arts Joy stamp, Brilliance graphite black ink, clear embossing powder, $ store ribbon, Hodges & Lettau rhinestone, red Sharpie Pin It Now!

Wednesday, December 7, 2011

Amber Ink Holiday Hop Winner!

*** Please scroll down or click here for this week's Crafty Creations Challenge.***


The elves are back on their shelves, and it's time to announce my winner for the Amber Ink Holiday Blog Hop. Drumroll, please:


Congrats, Sav! The elves at Amber Ink will be emailing you your own elf soon. Remember, there were 22 other chances to win, so you can either retrace your blog hop steps (hops?) or check in at Amber Inklings later today. If you didn't get a chance to hop Monday or Tuesday, you should go now to see all the fun creations! If you want your very own elf, just head over to the Amber Ink store. Thanks for stopping by! Pin It Now!

Christmas Sentiments at Crafty Creations Challenges

This week at Crafty Creations Challenges, we're helping you get your Christmas cards done! The challenge this week is to create a Christmas card and include a sentiment. Our sponsor this week is Lili of the Valley. I used their beautiful Advent Calendar image:


I started with the advent calendar on some oatmeal cardstock -- I thought the colour and texture suited the image. Then I paper-pieced the dates and Christmas tree, and used a bunch of different media to colour everything: watercolour pencils, gold shimmer paint, white flocking and red glitter glue. When I went to cut out the image, there was no way I could cut around the original hanger effectively, so instead I added some twine and a brad to hang it from. I picked a sentiment to reflect the warm cozy feel of the image. The twine qualifies this card for the challenge at Do You Stack Up (DYSU#48) to use something you can tie.
Play along with our challenge for your chance to win a £10 gift voucher from Lili of the Valley
I'll be back later today with my winner from the Amber Ink blog hop!


Supplies: white & oatmeal cardstock, Lili of the Valley advent calendar & Unity October 2010 Kit of the Month October (Take Time to Laugh) stamps, Versacolor green ink, clear embossing powder, watercolor pencils, gold shimmer paint, Studio G white fun flocking, Studio G red glitter glue, Twinery peapod twine, gold brad, pop dot tape Pin It Now!

Monday, December 5, 2011

Amber Ink Holiday Hop Time!

Welcome to my stop on the second annual Amber Ink Holiday Blog Hop! This year twenty-two Amber Ink design alumnae are tapping into their inner elves to bring on some holiday cheer. I will confess... I had somehow missed the phenomenon that is Elf on the Shelf. Amber and Pam, the elves behind all that is Amber Ink, quickly filled me in. They also provided us with our choice of cute elf images to use for the hop. 


The inside says, "Good for you!"
This little guy looked to me like he'd been up to some mischief! He's dressed in some green snowflake lace iPaper, with a glittery collar and hat brim. (It's obviously December, because there is now glitter everywhere.) I printed the sentiment in Santa's Sleigh font. 
Now, let's talk prizes! One lucky person who comments on this blog post will win this elf image! And as they say on TV... but wait! There's more! The grand prize winner will receive an Elf on the Shelf gift set! So you'll want to be sure to comment on all the hop stops by Tuesday midnight EST, and on the Amber Inklings blog as well. Winners will be announced on Wednesday, December 7th. Good luck and enjoy the hop! 


Supplies: white cardstock, green snowflake lace tiny iPaper, Sharpies, Prismacolor pencils, Stampin' Up dazzling diamonds glitter, pop dot tape, corner-rounding punch
Pin It Now!

Friday, December 2, 2011

Happy Birthday x2

The super-talented Virginia is celebrating a, shall we say, significant birthday -- and has asked everyone to join in on her celebration! Well, not the birthday cruise she's going on with her family part, but the general festivities. So here's a card I've made with her in mind:


Virginia is a pro with her Hero Arts stamps, so I thought it was only fitting that I use some to make a card in her honour. Also appropriate -- I won the Hero Arts envelope background from her as blog candy! So I used it to make a sky-type background, and picked some fun Friendly Flags to make a birthday banner. When Virginia sent me that envelope background (and the cute snail stamp I won with it) she also generously included some fun SRM sentiment stickers. I thought this one, with the little flower, was perfect with the end pennants.
If you would like to join in on wishing Virginia a happy **th birthday, check out this post.
I'm entering this card in the current Simon Says Stamp challenge... I'm a big fan of their Anything Goes challenges! 
You may have noticed my title refers to more than one birthday... and that's because this little blog turns one today! So, as a long, proud tradition dictates... it seems a little blog candy is in order!


This cute little sentiment set from Inkadinkado can be yours! Just leave a comment on this post before Thursday, December 8th at midnight EST. I'll announce the winner Friday, December 8th. You don't have to be a follower of Bashful Blogging to participate, but I'd love to have you join if you're not! 


Supplies: white cardstock, Hero Arts friendly flags & envelope background stamps, Memento tuxedo black, Memories passion red & Brilliance pearlescent sky blue inks, clear embossing powder, watercolour pencils, SRM sticker, natural hemp twine, pop dot tape


Pin It Now!

Wednesday, November 30, 2011

Inspiration at Crafty Creations


This week at Crafty Creations the challenge is to create a project based on this beautiful inspiration photo. So many possibilities! The rich colours, the multiple textures... I chose to focus on the subtle festive touches -- the poinsettia towels and the little evergreen wreath. And from there, I got to this: 


My first attempt, I stamped and embossed this Christmas postcard image in silver and coloured it in using the colours in the photo. It looked okay, but didn't really do the trick for me. So I tried again, leaving the details uncoloured and letting the deep green and red carry the show. 
This week is my last week as a guest designer at Crafty Creations Challenges. Sad? No -- because I'm going to join the design team full time! I'm so excited! Thank you to the fabulous ladies there, especially Peggy and Deena, for making me feel so welcome. 


Supplies: Stampin' Up very vanilla, real red and (?) green cardstock, Stampin' Up Christmas Postcard stamp, Colorbox evergreen ink, clear embossing powder, Stampin' Up ticket-corner punch, dimensionals Pin It Now!

Sunday, November 27, 2011

Amber Ink's First Pinny Party!

I have a soft spot for Amber Ink -- after all, they trusted ME, a brand-new blogger, to design for them for a month last year. Not to mention they have incredibly fun digital images and digital paper! So when they announced their latest blog party, I really wanted to play along!


Here's the deal -- if you hang out on Pinterest at all, you may have pinned lots of great, inspirational ideas that you plan to use... someday. But of course instead, you just pin more terrific ideas... for someday. Well, the brilliant minds at Amber Ink are encouraging us to actually take our pins and use them! 
So the weekend was a little lot busier than my average one, but I did want to play in the first ever weekend Pinny Party! Here's the pin I chose be inspired by: 


I like to use music on my Christmas cards, and really liked the clean and simple design of this. So of course my end product turned out quite differently:


It really didn't seem right not to use some Amber Ink iPaper for their first official Linky party, so I picked some Bubble Fizz: Green iPaper for a fun background. I also decided I didn't want floating ornaments, so hung them with some silver elastic cord. Not as clean and graphic as my inspiration, but I think it turned out kind of fun! 
Hope your weekend was great, whether it was a long Thanksgiving one or not!


Supplies: white cardstock, Amber Ink bubble fizz: green iPaper, silver pearl paper, Hero Arts Get Merry! stamps, Colorbox cranberry ink, Spellbinders Nestabilities 1 1/2 inch circle die, silver cord, corner-rounder punch Pin It Now!

Wednesday, November 23, 2011

Being Grateful at Crafty Creations

Just in time for American Thanksgiving, this week's challenge at Crafty Creations Challenges is to make a thank you or gratitude card or other project. Even though Canadian Thanksgiving has passed, it is always good to have a thank you card or two in reserve.


It's a funny thing about inspiration, or mojo, or if you're feeling particularly arty, the Muse. :D I was on a total roll there for a couple of weeks, happily cranking out cards and tags. Then, starting this past weekend... nothing. So it's helpful to have a stamp that can do most of the heavy lifting, such as this CardArt Thanks Phrase stamp from Hero Arts. I couldn't let it do all the work, though, so I did manage to do a little cutting, distressing (me!), and picked a pair of coordinating patterned papers. Although you can't see it in the photo, the flowered paper has text in the background, which goes nicely with the definition on the stamp. 


And hey, if you're feeling bereft of ideas, why not make TWO cards? I decided to try my hand at the current Paper Smooches SPARKS challenge. From the inspiration photo, I took away the flowers with their scallopy shape, and the general colours, particularly the greys. I recoloured the digital image and sentiment to grey before printing it out and colouring with Sharpies and Prismacolor pencils. I also played with my first nestabilities to cut and emboss the big scalloped circle! I considered making this a circle card, but liked the look of the yellow background.
Come play with us at Crafty Creations Challenges! And to my American friends and visitors, Happy Thanksgiving! 


Supplies: (thanks) Stampin' Up very vanilla cardstock, Daisy D's and Karen Foster patterned paper, Hero Arts CardArt Thanks Phrase stamp, VersaMagic Spanish olive chalk ink; (thankful) white & yellow cardstock, Paper Smooches digital stamps, Sharpies, Prismacolor pencils, silver gel pen, Spellbinders Nestabilities classic scalloped circles large Pin It Now!

Friday, November 18, 2011

Double Inspiration

Today it's my turn to pick again from the September/October issue of Paper Crafts magazine, and I must have chosen well -- both Donelda and I ended up making two cards from my choice! I picked Ellie Augustin's Brew Some Fun card on p. 46. I chose it both for the layout and for the fact that it wasn't a standard A2 size card. First up, the card I'm undecided about:


I decided to go with colours similar to the ones on the inspiration card. The edges of the patterned paper and the pine cone circle are sponged with gold ink, and the image and sentiment are embossed in gold. The sentiment does show up better in real life than it does in the photo! 
Now this one I'm really happy with!


I thought this little polar bear scene was perfect to highlight in a circular frame! And since I already had this patterned paper out from the card I posted yesterday, it all came together quite easily.  
If Donelda had as much fun as I've had doing this, don't be surprised if we do it again one of these days! For now, head on over to Donelda's blog to see her terrific creations!


Supplies: (Happy Holidays) Stampin' Up old olive & very vanilla cardstock, old olive patterned paper, Inkadinkado pine cone stamp, Craft Smart sentiment stamp, Versamark and Colorbox gold inks, gold embossing powder, dimensionals; (polar bears) white cardstock, DCWV patterned paper, Stamp Barn stamp, Brilliance graphite black ink, clear embossing powder, watercolour pencils, Atyou Spica clear glitter marker, silver half-pearls, Offray ribbon, dimensionals Pin It Now!

Thursday, November 17, 2011

Week Two of Paper Craft Magazine Inspiration

My blogging buddy Donelda and I are back with another double dose of Paper Craft magazine inspiration! This week, we're featuring Donelda's choice first. She picked Cristina Kowalczyk's Ahoy Birthday card on p. 58 of the September/October issue.  


Cristina's card had made my shortlist of cards to CASE, too, so this should have been easy, right? Not so much. Since I'm totally in Christmas card mode now, I tried that route first. We've both been picking cards from the feature on using canvas, so I got out all my Christmas fabric (What? Doesn't everyone have a collection?) and started trying different pieces and combinations. After immense frustration a few false starts, I realized I was going nowhere fast, so put everything away and went in an entirely new direction -- a close interpretation of the original card, following the colours, layout and theme. Patterned paper takes the place of the canvas strips, and my image and sentiment are a Unity/Webster's Pages itty bitty duo that hadn't seen ink before. I thought the figure eight knot in the twine added a nautical touch, too. 
We'll be back tomorrow with our interpretations of the card I chose! 


Supplies: white cardstock, DCWV patterned paper, Unity/Webster's Pages Celebrate, Colorbox royal blue & Memories passion red inks, clear embossing powder, red Divine twine, dimensionals Pin It Now!

Wednesday, November 16, 2011

Tag, You're It!

I'm back! For the Crafty Creations Challenge post, please check this post.


I wanted to sneak in before the deadline of this week's CAS-ual Fridays challenge (CFC28) to create a tag, as well as the same theme over at Bows and Berries. The tag itself is cut from a manila file folder, the music comes from a carol book, and the rest are bits and pieces from my stash.
Tomorrow starts week two of CASEing Paper Crafts magazine with Donelda!

Supplies: manila file folder, white & red cardstock, Stampin' Up Holiday Collection stamp, Colorbox evergreen ink, brass eyelet, green ribbon
Pin It Now!

Crafty Creations Challenges: Recycle It!

This week, the Crafty Creations challenge wants you to create a project with at least one recycled item. What, did they arrange this challenge just for me?


How did I recycle? Let me count the ways...

  1. The bag itself originally held crafting goodies that I bought at The Rubber Stamp Store in St. Catharines. Wasn't it nice of them to give me a bag I could save and reuse? 
  2. The snowflakes are punched from a card that a charity sent out... you know, the "here are some cards, please give us a donation" kind. I recycle them both by cutting out cute parts to incorporate into gift tags, and by using punches, as I did here.
  3. I had two narrow strips of silver pearl paper left over from trimming a sheet for a different project, so they became paper curls. 
  4. The raffia and silver cord are "recycled" out of my Christmas wrapping stash. 
  5. The snowflake background could almost count, too... my buddy Emily didn't want the stamp any more, so she recycled it on to me! 
Not bad, huh? The non-recycled elements include the festive deer from DT member Deena's Etsy store, A Creative Need. By recolouring him before printing him out, I only needed to add the lightest of shading to him, plus some silver and blue gel pen to his pine cone ornament. Here's a closer look at some of the glittery goodness:


Please visit Crafty Creations Challenges to see what the rest of the DT has created, and to add your own project! 


Supplies: kraft gift bag, white & blue cardstock, DCWV Christmas Collection patterned paper, silver pearl paper, Brilliance moonlight white ink, tumbled glass & broken china distress inks, Ranger snowflake embossing tinsel, Martha Stewart snowflake punch, Prismacolor pencils, gel pens, Icicle Stickles, raffia, silver cord Pin It Now!

Friday, November 11, 2011

Friends with Christmas Flair

*** This is my second post for today! Please check out my Paper Crafts magazine inspiration challenge, Part II, here. ***


I love this image from the October 2010 Kit of the Month, Take Time to Laugh. It's so versatile! For this card, I kept it simple, embossing it in silver, then watercolouring the sentiment and ornaments. What do you think of the non-traditional colours? 
Pop on over to the Unity blog to see the rest of this week's Friends with Flair entries! 


Supplies: white and Stampin' Up rich razzleberry cardstock, Unity October 2010 Kit of the Month, Take Time to Laugh stamp, Stampin' Up rich razzleberry ink, silver embossing powder, Stampin' Up rich razzleberry grosgrain ribbon, corner-rounding punch, dimensionals Pin It Now!

CASEing Paper Crafts Magazine with Donelda, Part II

I'm back with another CASE from the September/October issue of Paper Crafts, along with my blogging friend Donelda! Today we're interpreting her choice from the magazine, Betsy Veldman's Doily Gratitude card on p. 56:


This was challenging! I went in a few different directions before I ended up with this finished product. The ink-sprayed canvas on the original made me think of denim for some reason, but that idea didn't really go anywhere. Then the doilies made me think of snowflakes. Since I didn't have any large snowflake stamps, I went with an overall background pattern of them. My large chipboard element has way more coats of paint than it should! I started with two coats of gesso (the second because I forgot to cover the edges properly with the first coat). Then I thought silver might look good, so I sponged it with some silver ink. Didn't like that look! It took two coats of acrylic craft paint to cover the silver properly. Another small chipboard element, some lace and a sentiment finished the card. 
Remember to check out what Donelda did for her CASE of this card! Plus, we had so much fun this week, we've picked two more cards to CASE next week. Hope we'll see you then!

(On an entirely different note: Today is Remembrance Day in Canada. I doubt I'd be writing this blog, or making cards with rubber stamps, or doing many of the other things I enjoy doing, if it wasn't for the freedom I enjoy today thanks to the generations that came before me, a few of whom were my relatives.)


Supplies: white and Stampin' Up riding hood red cardstock, riding hood red patterned paper, Local King Rubber Stamp snowflakes background stamp, All Night Media snowflake stamp, Studio G joy stamp, Brilliance moonlight white & Stampin' Up riding hood red inks, Claudine Hellmuth Studio gesso, Anita's white acrylic craft paint, Ranger snowflake embossing tinsel, Stampin' Up chipboard elements, lace Pin It Now!

Thursday, November 10, 2011

CASEing Paper Crafts Magazine with Donelda, Part I

After I posted a couple of cards inspired by those in the September/October issue of Paper Crafts magazine, fellow card maker Donelda (Wiggy's World) suggested we should challenge each other to pick cards that each of us would CASE (copy and share everything). What a fun idea! I picked the Autumn Button Tree Card card on p. 52 by Katie Gehring. Here is my take on it:


I picked the original card mostly for its layout, so I followed the card design quite closely. Shockingly (for me) there is NO STAMPING on this card! The trees are paint chips! (Inspired by these.) Even though I have more Christmas stamps than anyone should really need, I couldn't find a sentiment that worked for me, so this one is computer-generated. The paper is from Echo Park's Holly Jolly 6"x6" paper pad. 
Now you can head over to Donelda's blog to see her interpretation! Tomorrow, we take on her choice from the issue. See you then, I hope! 


Supplies: white & Recollections metallic green cardstock, Echo Park Holly Jolly Merry and Bright patterned paper, Cuttlebug swiss dots embossing folder, paint chips, corner-rounding punch, dimensionals Pin It Now!

Wednesday, November 9, 2011

Crafty Creations Challenge: PB&J, Anyone?

Mmmm, peanut butter and jelly sandwiches. How's that for a challenge theme? At Crafty Creations Challenges this week, we're asking you to create a peanut butter and jelly sandwich card or other project! Peanut butter = kraft, jelly = a colour of your choice, and the bread = white or cream. 


This beautiful wreath image is from our sponsor this week, the talented Claire, a member of the design team and owner of the Etsy store Hope Jacare. I resized the image so it would be just a bit bigger than a 4 1/4" card base. I coloured the base of the wreath with a kraft-coloured marker, and paper-pieced the hearts with my jelly colour of riding hood red. The "joy" sentiment is embossed in bread, I mean white. I thought about a circular card base, but decided I wanted more of the kraft to be visible. (I do think I need a bigger corner-rounder, though; I would have liked that look a bit more.) 
I hope you'll join us in this fun and tasty challenge! And please come back to the blog tomorrow when I start a fun challenge with fellow crafter Donelda


Supplies: white, Stampin' Up kraft and riding hood red cardstock, riding hood red patterned paper, Hope Jacare digital image, Unity Oh! Joy! sentiment, Brilliance moonlight white ink, white embossing powder, corner-rounding punch, dimensionals Pin It Now!

Monday, November 7, 2011

A Card from Angela!

I've been remiss in not showing off this gorgeous card I received from Angela


You can read about what Angela used to make this card here. (And if you haven't before, you really should visit her blog!) I really like the background stamped squirrels and that the acorn caps just happen to be in my favourite colour. ;) Angela sent me this to thank me for the birthday card I sent her, and included a few more of the squirrels stamped just for me, and a couple of the amazing medallions she makes out of washi tape. So I could send Ang a thank you card for this, but then she might feel obligated to send a card to me to thank me for the card, and... maybe I'll wait till closer to Christmas. 
Wednesday will be my second post for Crafty Creations Challenges, and you still have some time to enter the current colour challenge Pin It Now!

Friday, November 4, 2011

Friends with Flair and a Friend Indeed

Happy Friday! Now that it's November (and rather chilly today!), it's really not hard at all to think about making Christmas cards. I made this one using the new Unity Sketch challenge layout.


These two cute snowmen are from the January 2011 Kit of the Month, To the Moon and Back. I don't actually own that kit, but when I expressed my liking for them a while back, my friend Emily stamped a few and popped them in the mail for me. This when she was in the middle of preparing to move to a new house! Now that's friendship. The tag and circle elements of the sketch seemed perfect for these two dudes. I threaded the fake buttons on the tall snowman with real twine ;) and gave the snow and the round snowman some glitz with Stickles. 
I'm linking up to Unity's Friends with Flair, and since I've used both twine AND ribbon, I'll add it to Ribbon Carousel's current "Anything Goes" (RCC27) challenge. It doesn't extend by much, but the ribbon on the tag qualifies for the CAS-ual Fridays challenge(CFC27) to go "over the edge" of your card. Have a great weekend! 


Supplies: Gina K. white cardstock, Stampin' Up real read and kraft cardstock, DCWV Christmas Collection patterned paper, Unity January 2011 Kit of the Month (To the Moon and Back) stamps, Memento tuxedo black ink, sharpies, 1" circle punch, hole punch, Twinery maraschino twine, Celebrate It ribbon, Frosted Lace Stickles, pop-dot tape  Pin It Now!

Wednesday, November 2, 2011

Last-Minute Paper Smooches SPARKS Challenge

*** This is a rare, 2nd post of the day! Please click HERE for the Crafty Creations Challenges post. ***


Even though the outline has been wandering around in my head for a little while, it took until today to create this card for the current Paper Smooches SPARKS challenge, closing tonight:


From Kim's inspiration photo, I focused on the woodland setting, the colours, the tree/wood and the shape of that vintage VW micro-bus. That shape reminded me of this critter from the PS set Birthday Buddies. For a minute or two, I thought about giving him a watery setting and making him a beaver -- Canada's currently in a bit of a tempest over whether our traditional symbol, the beaver, should be changed to the polar bear. Although I like polar bears, I'm still firmly Team Beaver in the national symbol department. The inspiration pic has nothing to do with water, though, so I stuck to the original gopher/groundhog look. The world's smallest pom-pom tops his birthday hat, and he's framed in a woodgrain pattern from My Mind's Eye. I was SO tempted to make his big nose red, but settled on shining up his nose and teeth with Glossy Accents. The whole design is fairly vertical to match the inspiration, too. I think he'll make a fine masculine birthday card. :P 


Supplies: white & cream cardstock, My Mind's Eye Lime Twist Life of the Party patterned paper, Paper Smooches Birthday Buddies stamps, Brilliance coffee bean ink, clear embossing powder, Prismacolor pencils, Twinery mandarin twine, Glossy Accents, pop-dot tape Pin It Now!

Crafty Creations Challenges Guest Designer!

Haute Autumn button


I'm very excited to be guest designing at Crafty Creations Challenges for the month of November! I was so honoured when Peggy wrote to ask if I would play along with the talented crafters there. Their challenges are always original and inspiring, so be sure to check them out!
This week's challenge is to use green, purple, silver... and snow! Snow can be interpreted any way you wish. I picked a super-cute image from this week's sponsor, Stretch N' Bubbles.


I knew right away I wanted to paper-piece the little birds. I second-guessed that decision more than once while cutting and gluing teeny-tiny bodies and wings, but I persevered. :P (Note to self: remember next time to colour BEFORE paper-piecing, even if really excited about it.) I also paper-pieced the snowman's accessories, framing the scene in the same paper. The silver gets into the mix from the snowman's hatband and the strings the birds have their little presents and ornaments hanging from. It took me a while to decide how I wanted to achieve the snow element of the challenge (well, besides the fact that, yes, he's a SNOWman). Eventually, I embossed some snowflakes onto cardstock then made them shine with Smooch spritz. Here's a closeup:


I debated adding a sentiment, but decided I liked the scene as it was. I also thought about adding some colour to the sky or some shading to the snowman, but knew the odds of messing the whole thing up were just too high. :P 
Be sure to check out Crafty Creations Challenges to see the rest of the design team's beautiful work! I hope you're inspired to create something for this week's challenge!


Supplies: white cardstock, Karen Foster Designs Shades of Purple & My Mind's Eye Lime Twist Life of the Party patterned papers, Stretch N' Bubbles feed the birds digital stamp, Prismacolour pencils, Cuttlebug snowflake embossing folder, vanilla Smooch spritz, black diamond Stickles, silver gel pen Pin It Now!